With the BarcodeMaker plug-in installed, barcodes are created and managed through the PatternMaker palette in Adobe InDesign. Follow these steps to add your first barcode:
Step 1: Install the Plug-ins
Download the installer here. After you install, you’ll get two plug-ins:
BarcodeMaker
PatternMaker
-> The PatternMaker palette is where you’ll create and adjust barcodes.
Step 2: Launch InDesign and Open a Document
Open the document where you want your barcode to appear.
Step 3: Select a Frame
A frame must be selected before you can apply a barcode.
You can draw a new empty frame, or select an existing one.
Step 4: Open the PatternMaker Palette
Window > PatternMaker
Step 5: Apply a Barcode
From the PatternMaker popup menu, choose the barcode type you want.
Click the Apply Pattern button.
The selected frame will update with your barcode.
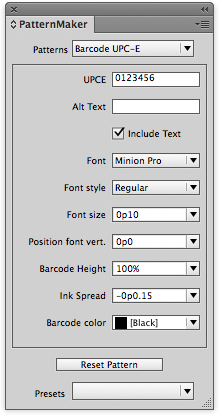
Step 6: Adjust Barcode Options
The PatternMaker palette changes depending on the barcode you’ve applied.
-
Example:
UPC-E has different options than DataMatrix.
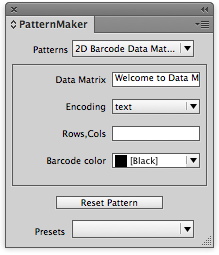
Experiment with the available options in the palette. Each time you make a change, the barcode updates instantly on the page.