After a data source has been added and activated, the data will appear in the DataLinker palette. You can sort through your data either using the navigation arrows located at the bottom of the palette, or by typing the key record into the record dropdown widget at the top of the palette. You can also dropdown that menu item and scroll through the key fields in your data.
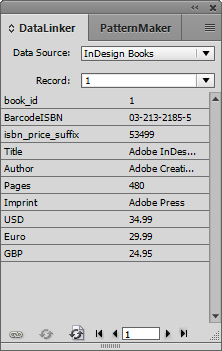
Scroll through your data using either the Record: dropdwon (top) or the arrow buttons (bottom right).
Once you have your record selected in the DataLinker palette, you can place the data into your InDesign document by going through the following steps:
- Choose the field you wish to insert.
- In the DataLinker palette, each item in the listbox represents a field in the database record.
- For inserting text fields, you'll need a flashing text cursor in a text frame.
- For inserting image fields, you can either have the text selection active (to insert inline images) or a graphic frame selected (to insert an image into that frame)
- Click on the “Insert Field” button in the lower left of the palette
- The data will be inserted into your InDesign document. It will be marked by non-printing brackets at the start and end of the data.
Now that the data exists in your InDesign document, it can be updated from the database at any time by either synchronizing an individual field or by synchronizing the entire document. See the section Synchronizing Data for more information.